How to Rig Flying Fish for Kite Fishing
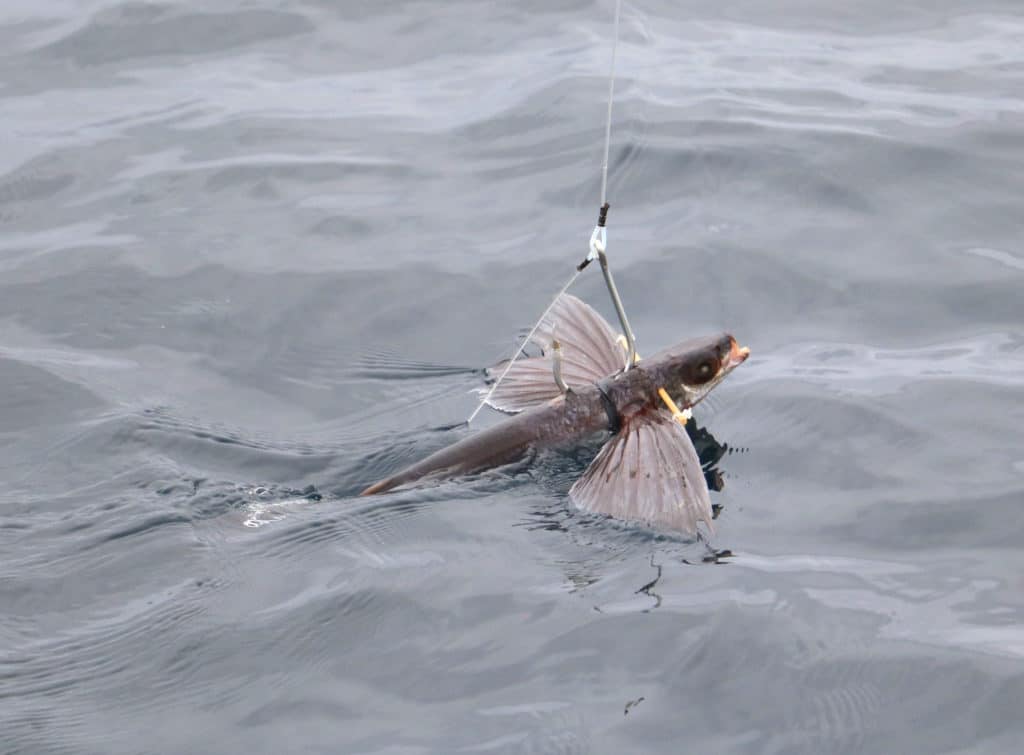 A flying fish rigged with wings extended, does the job on big tuna when drifted and slow-trolled on the surface from a kite.
Jim Hendricks
When fished from a kite, flying fish is one of the most effective baits for yellowfin and bluefin tuna, particularly in Southern California and Baja. Securing the wings in the extended position is key, as is making sure the flyer sits flat on the water while suspended from a kite.
This rig, recommended by California-based Capt. Barry Brightenburg, produces Pacific bluefin tuna ranging from 125 to 250 pounds.
Here are the tools and steps for rigging this effective offshore bait. (The sizes of the hooks varies, depending on the size of the flying-fish bait, which range from 10 to 14 inches in length.)
What You’ll Need:
- Frozen or fresh-dead flying fish
- 12-inch bamboo BBQ skewers
- Small zip-ties
- Medium zip-ties
- No. 64 black rubber band
- 10/0 to 12/0 big-game hooks such as Mustad 7691 or Owner Jobu
- 4/0 to 5/0 4X Gamakatsu treble hook
- 200- to 400-pound-test fluoroleader material (depending on the size and selectivity of the tuna)
- Crimps, crimping press and chafing gear
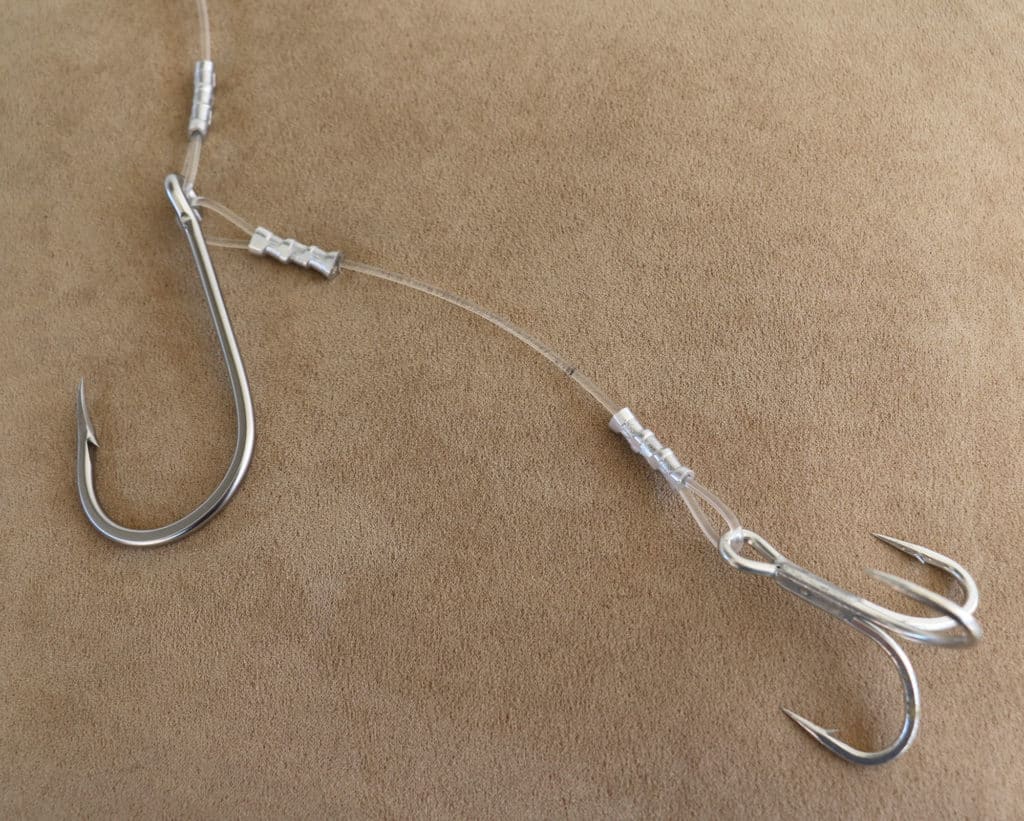 Build the leader first, utilizing a pair of hooks.
Jim Hendricks
Crimp 6 feet of fluorocarbon leader to the main hook, then crimp one end of a 6- to 8-inch fluoro leader to the eye of the hook and the other end to the treble hook. Crimp a loop with a thimble or other chafing gear in the other end of the leader, to a snap to the main line.
Step 2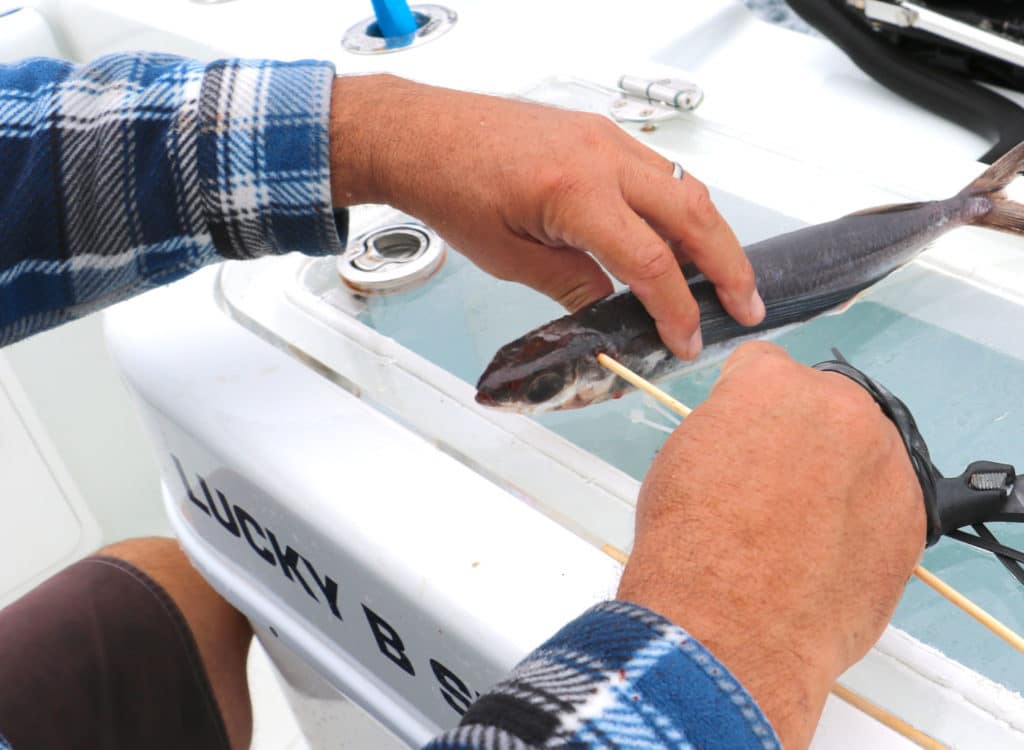 Place the skewer in the upper-rear area of the gill plates.
Jim Hendricks
Thaw the flying fish. Push a BBQ skewer through the upper-rear area of the gill plates. It should go above the spine and lie level and perpendicular to the body of the bait.
Step 3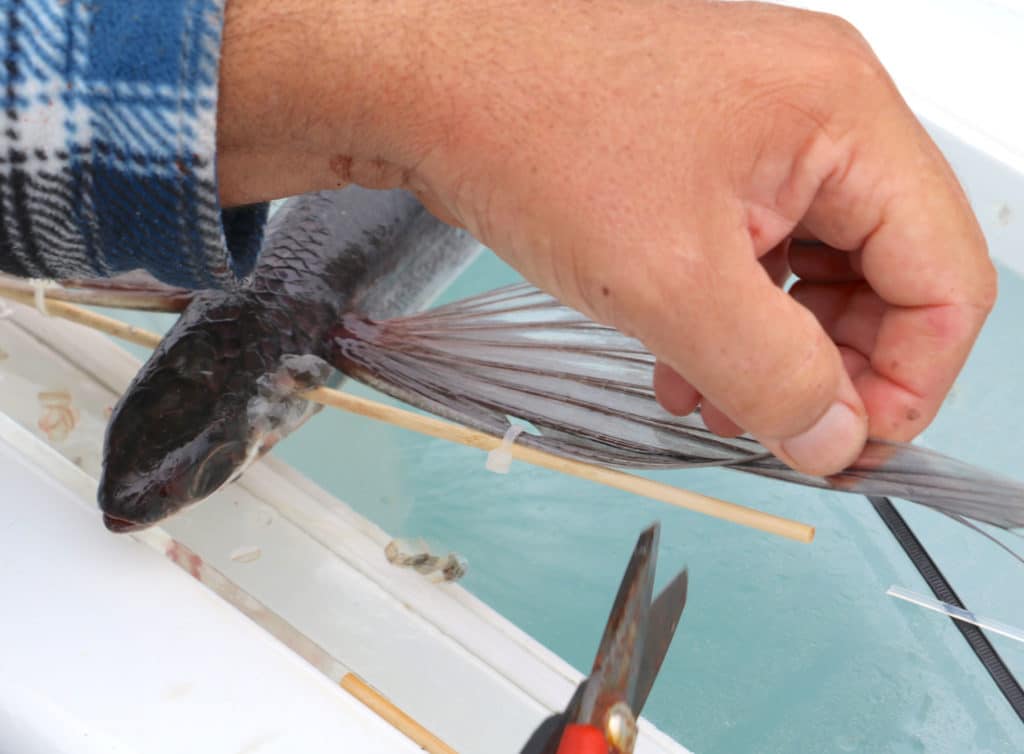 Extend the wings of the flying fish, keeping them propped wide open.
Jim Hendricks
Extend one wing at a time, pulling it gently forward to the skewer. Pierce the membrane just behind the first spine of the wing and secure the wing to the skewer with a small zip-tie. Clip the skewer ends off 3/8-inch outside the zip-ties.
Step 4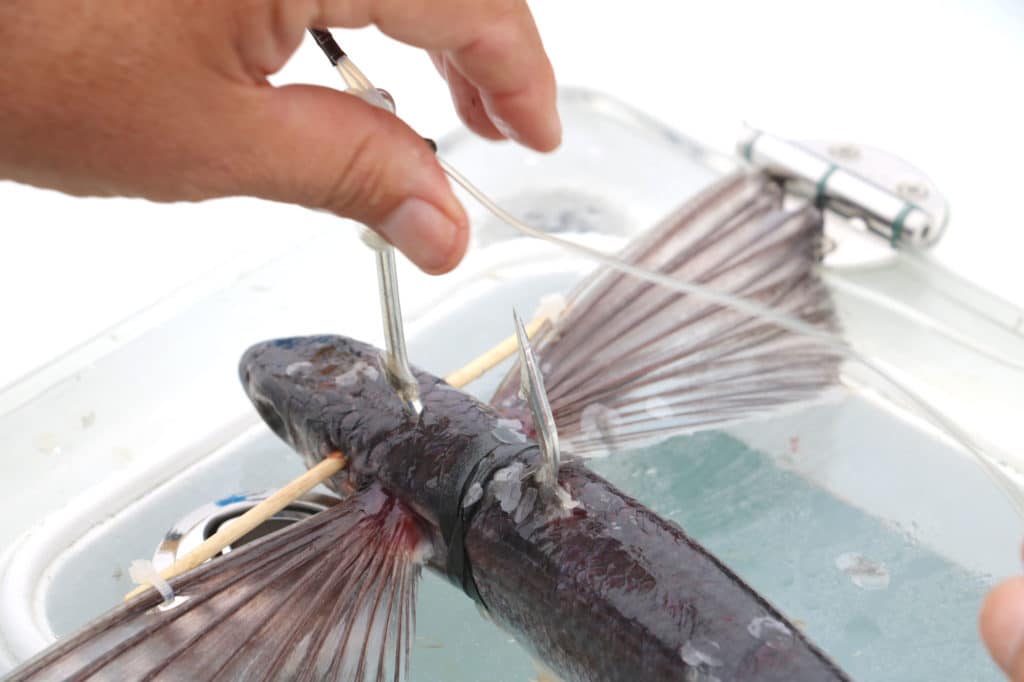 Secure the main hook behind the head of the flying fish.
Jim Hendricks
Slide a doubled a No. 64 black rubber band over the tail of the bait to ¼-inch behind the base of the wings. Make sure the rubber band is not twisted. Push the point of the main hook through skin and meat just behind the head, in front of the rubber band, and bring it up and out behind the rubber band.
Step 5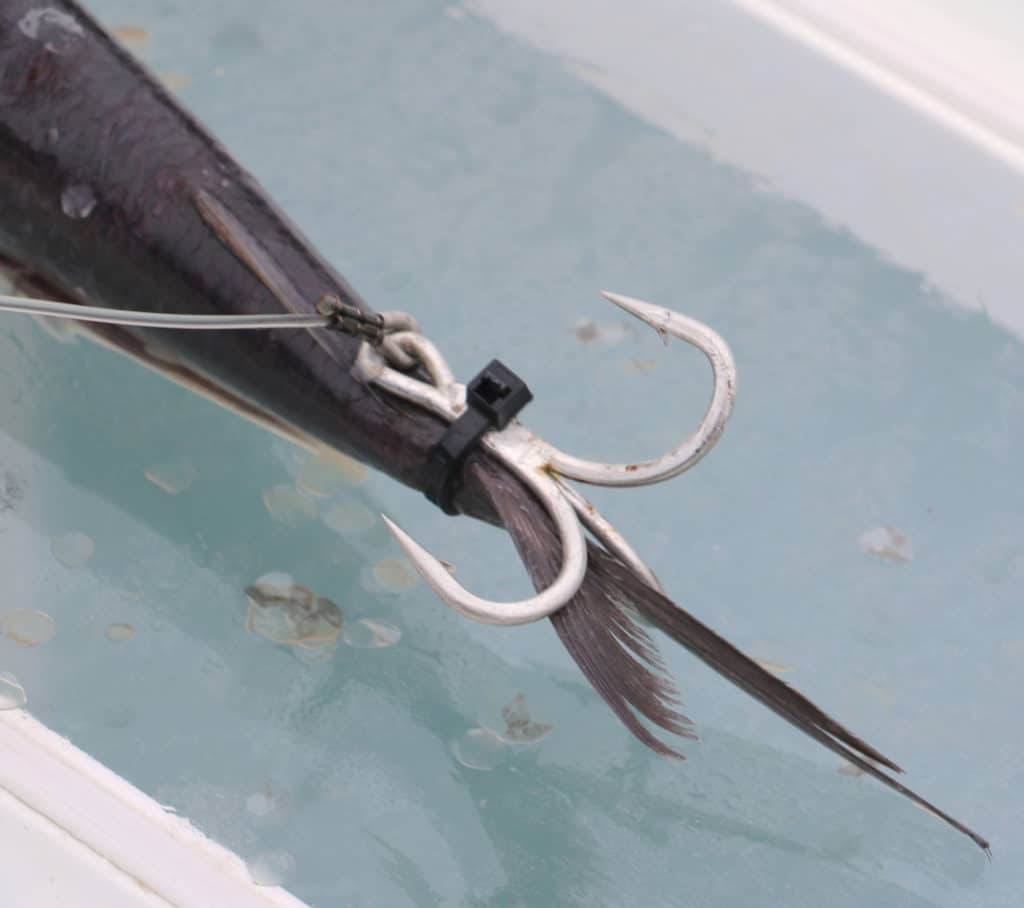 Attach the stinger hook to the tail of the flying fish.
Jim Hendricks
Zip-tie the treble stinger hook to the bait just in front of the tail and trim the zip-tie.
Step 6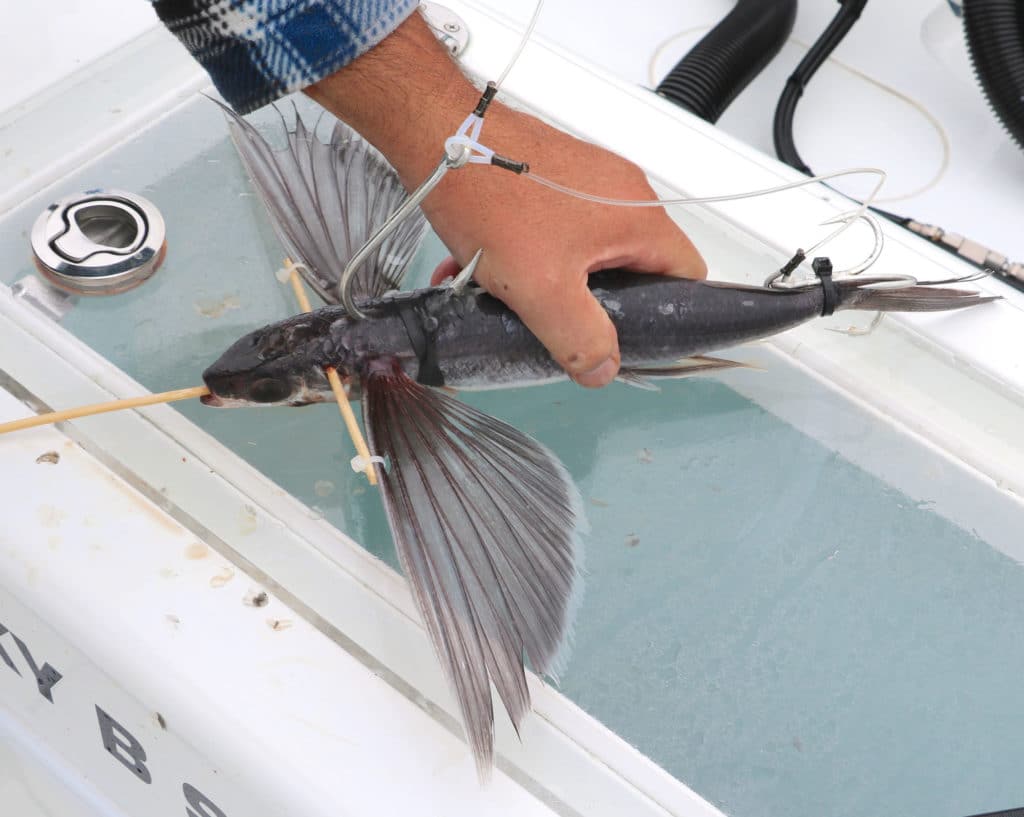 Stiffen the body of the flying fish.
Jim Hendricks
To ensure that the body of the flying fish lies straight, stiffen it by pushing a skewer through the mouth and down the length of the body, parallel to the spine. Trim excess skewer at the mouth.
Step 7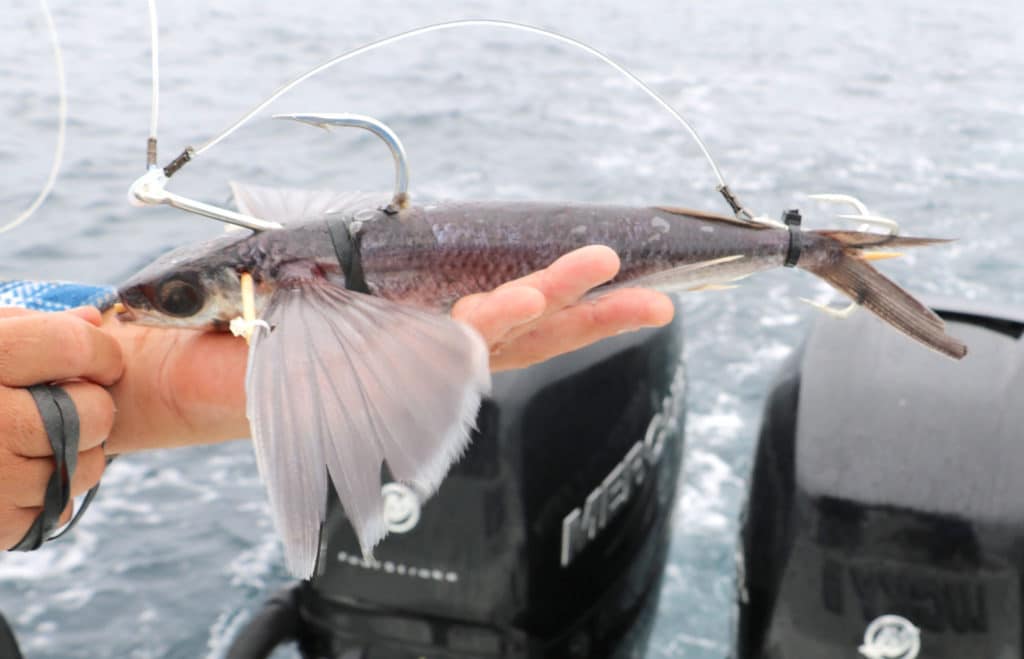 The finished flying fish bait.
Jim Hendricks
The finished bait should lie flat and level on the ocean surface when suspended from a kite, making it a tempting target for big tuna.
The post How to Rig Flying Fish for Kite Fishing appeared first on Salt Water Sportsman.
- Home
- About Us
- Write For Us / Submit Content
- Advertising And Affiliates
- Feeds And Syndication
- Contact Us
- Login
- Privacy
All Rights Reserved. Copyright , Central Coast Communications, Inc.